Axsy Scheduler makes it easy to plan routes between unscheduled Appointments. The Scheduler will also be able to optimise these routes to minimise travel times between locations.
Adding Locations to a Route
See in Figure 1 there is a list of unscheduled Appointments at different Locations and an Inspector will have to visit each of the Locations today.

Figure 1 - Scheduler UI: Unscheduled Appointments + Open Map
Users can select 'Open Map' to see all the Locations of the Appointments. On the Map Page (Figure 2), double click a Green Pin (Location) to add it to the route, or use the Rectangle, Circle or Polygon draw options underneath the zoom buttons to add all Locations within a drawn shape. See in Figure 3 that once the Locations are selected, the Left Tab changes to Locations instead of Appointments. This shows the User all the individual Appointments at each Location and the User can choose whether to include/exclude the Appointment from the route.

Figure 2 - Map View in Scheduler

Figure 3 - Map View in Scheduler: Selected Locations + Appointments
Creating a Route
Once the Locations and Appointments have been selected, clicking 'Get Directions' will invoke the Google Maps API, and cause a route to be drawn as shown by the red lines in Figure 4. This however, is clearly not the most optimal route. Clicking 'Get Optimised Directions' will change the ordering of the Locations to be the route with the shortest total travel time. See in Figure 5 how the ordering of the Locations has changed as well as the red line route.

Figure 4 - Map View: Unoptimised Route

Figure 5 - Map View: Optimised Route
Scheduling Appointments in a Route
Once the route has been established, return to the Scheduler UI by clicking the 'Hide Map' button in the top right of the screen. Notice here, the Appointments are now placed in order according to the route created on the map. Now that the Appointments are ordered correctly, the route can be bulk assigned to a Resource/User by dragging and dropping one of the Appointments into the relevant swim lane.
Dropping the appointment onto the swim lane will show the 'Bulk Assign' modal. This allows the User to decide between bulk spacing (30 min gaps between Appointments) or 'Real Travel Times' which takes the real time to travel between Locations (according to Google Maps). In Figure 7, the travel times between each Location us .
NOTE: To change the default Bulk Assignment Spacing, please see the Scheduler Custom Settings KBA
Once completed, see in Figure 8 that all the Appointments included in the route have populated the swim lane with differing gaps between each block (because 'Real Travel Times' was selected). Also note that Appointments are not longer visible in the Unscheduled Tab on the left side of the screen.

Figure 6 - Scheduler UI: Ordered Appointments

Figure 7 - Bulk Assignment Modal
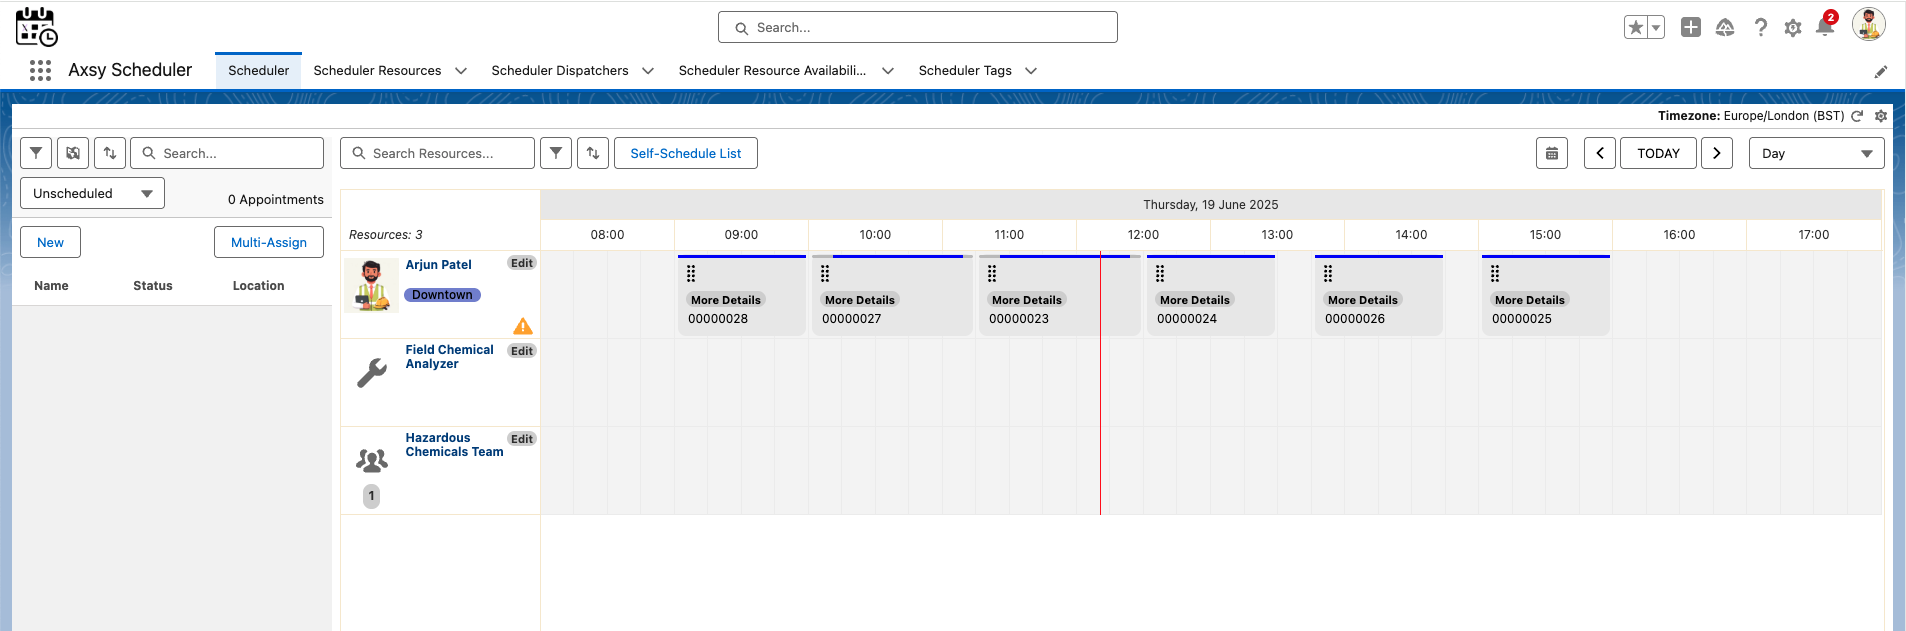
Figure 8 - Bulk Assigned Appointments in Scheduler